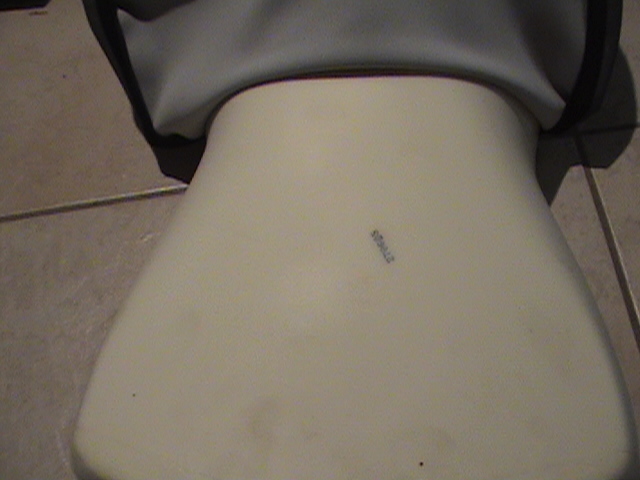
Batteries for the 1200GS
Odesey
PC680
PC680MJ (Metal Jacket)
Odesey
PC680
PC680MJ (Metal Jacket)
posted by Kelly at 9:18 PM
1 comments
![]()
This Blog will show you how to build items for the BMW 1200 GS. Many of the items are simple to build and will save you many dollars over the store bought items. Plus when you are out on the road since you built them yourself you will know how to fix them when something goes wrong.


 I saw one of the Whelen strip lights on the back of a LEO bike and decided that would be the way to go. The light mount was made out of 1" aluminum flat bar with some stainless screws with lock nuts. Redrilled the holes for the license plate to move it down. Since I left the blubs in place the CAN bus is still happy. For stop and tail I made spade and lug splices so no cutting of wires. The blinkers were soldered into the lugs on the flashers. I bought it in Houston at the Whelen distributer. Fleet safety Equipment. You can find them on the web for a bit cheaper. There are a bunch of different combos of LEDs. I got the Strip LED with Amber turn. model PSRASXCR They are about $100.
posted by Kelly at 6:12 PM
0 comments
![]()


posted by Kelly at 8:04 PM
0 comments
![]()


posted by Kelly at 9:03 AM
1 comments
![]()


posted by Kelly at 8:44 AM
0 comments
![]()
posted by Kelly at 8:03 PM
0 comments
![]()
| Crash bar buffer to crankcase, M6 | 8 Nm (6 ft-lbs) |
| Crash bar to engine, front right, M6 x 10, with loose washer | 8 Nm (6 ft-lbs) |
| Silentbloc to engine, M8 | 19 Nm (14 ft-lbs) |
| Crash bar to engine, rear left and right, Hex nut M8 | 19 Nm (14 ft-lbs) |
| Crash bar to engine, front left, M8 x 16 | 19 Nm (14 ft-lbs) |
| Oil drain plug, M16 x 1.5 | Initial torque, 23 Nm (17 ft-lbs) Final torque, 32 Nm (24 ft-lbs) |
| Engine block, M6 x 35 | 8 Nm (6 ft-lbs) |
| Engine block, M6 x 50 | 8 Nm (6 ft-lbs) |
| Engine block, M6 x 25 | 8 Nm (6 ft-lbs) |
| Engine block, M8 x 60 | 19 Nm (14 ft-lbs) |
| Engine block, M8 x 35 | 19 Nm (14 ft-lbs) |
| Engine block, M10 x 110/130 | Initial torque, 25 Nm (18 ft-lbs) Final torque, 90° |
| Cylinder to crankcase, left/right M8 x 55 | 19 Nm (14 ft-lbs) |
| Cylinder to crankcase, left/right, M6 x 35 | 8 Nm (6 ft-lbs) |
| Cylinder head cover to cylinder head tighten in diagonally opposite sequence | 10 Nm (7 ft-lbs) |
| Cylinder head to cylinder Nuts of tie bolts, M10 tighten in diagonally opposite sequence | Oil screw threads lightly Initial torque, 20 Nm (15 ft-lbs) Initial torque, 90° Final torque, 90° |
| Screw, M10 x 85 | 40 Nm (30 ft-lbs) |
| Screw, M6 x 30 | 9 Nm (7 ft-lbs) |
| Tightening cylinder head Nuts of tie bolts, M10 In diagonally opposite sequence slacken and retighten each nut in turn | Initial torque 20 Nm (15 ft-lbs) Final torque 180° |
| Screw, M10 x 85, Slacken and retighten screw | 40 Nm (30 ft-lbs) |
| Starter cover to gearbox housing, M6 x 16 | 8 Nm (6 ft-lbs) |
| Belt cover to engine, M5 x 14 | 5 Nm (4 ft-lbs) |
| Belt cover to engine, M5 x 20 | 5 Nm (4 ft-lbs) |
| Gearcase cover to crankcase, M6 | 8 Nm (6 ft-lbs) |
| Belt cover to alternator, M5 x 16 | 5 Nm (4 ft-lbs) |
| Clutch cover to engine, M6 x 16 | 8 Nm (6 ft-lbs) |
| Crankcase breather Vent connector to cylinder head, M6 x 16 | 8 Nm (6 ft-lbs) |
| Belt pulley to crankshaft, M22 x 1.5 | 140 Nm (103 ft-lbs) |
| Compensating weight to balancing shaft Neck-down screw, M8 x 70 | Replace screws Initial torque 10 Nm (7 ft-lbs) Final torque, 90° |
| Gear wheel to balancing shaft, M8 x 50 | 19 Nm (14 ft-lbs) |
| Camshaft Sprocket to auxiliary shaft, M5 x 16 | Replace screws 8 Nm (6 ft-lbs) |
| Pinion to camshaft, M10 x 1.25 x 25 | 65 Nm (48 ft-lbs) |
| Chain sprocket to crankshaft, M6 x 16 | 8 Nm (6 ft-lbs) |
| Housing for chain tensioner to crankcase, M6 x 25 | 8 Nm (6 ft-lbs) |
| Chain tensioner to cylinder left and right, M18 x 1.5 | 32 Nm (24 ft-lbs) |
| Fastener of timing-chain slider rail engine block, right, M10 | 18 Nm (13 ft-lbs) |
| Rocker/follower with bearing Locknut, valve adjusting screw, M6 x 0.5 | 8 Nm (6 ft-lbs) |
| Timing-gear carrier, camshaft bearing, bearing cap left/right, M8 x 30 | 19 Nm (14 ft-lbs) |
| Timing-gear carrier, camshaft bearing, bearing cap left/right, M8 x 40 | 18 Nm (13 ft-lbs) |
| Timing-gear carrier, camshaft bearing, bearing cap left/right, M8 x 65 | 15 Nm (11 ft-lbs) |
| Timing-gear carrier to cylinder head left/right, M6 x30 | 8 Nm (6 ft-lbs) |
| Timing-gear carrier to cylinder head left/right, M6 x 60 | 8 Nm (6 ft-lbs) |
| Oil supply Cooling oil line (inside engine) to crankcase, right Banjo bolt, M14 x 4.5 | 25 Nm (18 ft-lbs) |
| Cooling oil line (inside engine) to crankcase, left, M6 x 16 | 8 Nm (6 ft-lbs) |
| Oil pump to crankcase, M6 x 40 | Initial torque, 4 Nm (3 ft-lbs) Final torque, 90° |
| Oil intake in crankcase, right, M6 x 25 | 8 Nm (6 ft-lbs) |
| Pressure relief valve in crankcase, right Screw plug, M20 x 1.5 | 42 Nm (31 ft-lbs) |
| Oil filter, Sealing ring wetted with engine oil | 11 Nm (8 ft-lbs) |
| Air intake to cylinder head left/right, M6 x20 | 8 Nm (6 ft-lbs) |
| Engine Electrical System | |
|---|---|
| Primary spark plug to cylinder head Bosch YR 5 LDE, M12 x 1.25 | Thread free of oil and grease 23 Nm (17 ft-lbs) |
| Secondary spark plug to cylinder head Bosch YR 5 LDE, M12 x 1.25 | Thread free of oil and grease 23 Nm (17 ft-lbs) |
| Cover, secondary spark plug coil to cylinder head, M6 x 12 | 8 Nm (6 ft-lbs) |
| Alternator to crankcase, M8 | 18 Nm (13 ft-lbs) |
| Belt pulley to alternator Flange nut, M14 x 1.5 | 50 Nm (37 ft-lbs) |
| Wiring harness to alternator Flange nut, M6 | 6 Nm (4 ft-lbs) |
| Wiring harness to starter Hex nut, M8 | 10 Nm (7 ft-lbs) |
| Starter with gearing to engine, M8 x 60 | 19 Nm (14 ft-lbs) |
| Oil temperature sensor, M14 x 1.5 | 30 Nm (22 ft-lbs) |
| Oil pressure switch | 30 Nm (22 ft-lbs) |
| Transmitter for control unit Knock sensor to cylinder, left/right, M8 x 30 | 19 Nm (14 ft-lbs) |
| Speed sensor, camshaft, to cylinder head, M6 x 20 | 8 Nm (6 ft-lbs) |
| Temperature sensor in cylinder head, outside, M 10 | 10 Nm (7 ft-lbs) |
| Exhaust system | |
| Exhaust manifold to cylinder head, Acorn nut M8 | 19 Nm (14 ft-lbs) |
| Rear silencer to rear frame section, M8 x 45 | 19 Nm (14 ft-lbs) |
| Torca clamp to silencer and elbow, M6 x 20 Note: some versions of the REP-ROM say this is an M8 bolt and requires 55Nm (41 ft-lbs) -- which is too much for an 8mm bolt. | Optimoly TA 8 Nm (6 ft-lbs) |
| Oxygen sensor to exhaust elbow, M18 x 1.5 | Optimoly TA 45 Nm (33 ft-lbs) |
| Clamp, elbow, rear, M6 x 20 | Optimoly TA 8 Nm (6 ft-lbs) |
| Exhaust system | |
| Manifold to cylinder head, Acorn nut M8 | 19 Nm (14 ft-lbs) |
| Rear silencer to rear frame section, M8 x 45 | 19 Nm (14 ft-lbs) |
| Torca clamp to silencer and elbow, M6 x 20 | Optimoly TA 8 Nm (6 ft-lbs) |
| Oxygen sensor to exhaust elbow, M18 x 1.5 | Optimoly TA 45 Nm (33 ft-lbs) |
| Clamp, elbow, rear, M6 x 20 | Optimoly TA 8 Nm (6 ft-lbs) |
| Clutch | |
| Clutch housing to crankshaft Never re-use the original screws, M11 x 1.5 | Initial torque, 40 Nm (30 ft-lbs) Final torque, 40° |
| Clutch housing cover to clutch housing, M6 x 20 | 12 Nm (9 ft-lbs) |
| Clutch slave cylinder to gearbox, M6 x 18 | 8 Nm (6 ft-lbs) |
| Gearbox mechanical | |
| Oil filler plug, gearbox | 30 Nm (22 ft-lbs) |
| Oil drain plug, gearbox | 30 Nm (22 ft-lbs) |
| Gearbox to engine block, M8 x 55 | 20 Nm (15 ft-lbs) |
| Gearbox to engine block, M8 x 35 | 19 Nm (14 ft-lbs) |
| Gearbox to engine block, M8 x 70 | 19 Nm (14 ft-lbs) |
| Gearbox to engine block, M8 x 50 | 19 Nm (14 ft-lbs) |
| Gearbox cover to gearbox housing | 9 Nm (7 ft-lbs) |
| Gear potentiometer to gearbox | 9 Nm (7 ft-lbs) |
| Selector lever to selector shaft, M6 x 25 | 8 Nm (6 ft-lbs) |
| Locknut, ball socket on selector rod, Nut M6 | 8 Nm (6 ft-lbs) |
| Foot-operated shift lever to selector shaft, M6 x 25 | 8 Nm (6 ft-lbs) |
| Ball end to selector lever, Ball end M8 | 10 Nm (7 ft-lbs) |
| Locknut, ball end to selector shaft, Hex nut M8 | 10 Nm (7 ft-lbs) |
| Ball end to selector shaft, Ball end M8 | 10 Nm (7 ft-lbs) |
| Front forks | |
| Telescopic fork, ball-joint fork Leading link to engine, M12 x 20 | Initial torque, 45 Nm (33 ft-lbs) Final torque, 73 Nm (54 ft-lbs) |
| Threaded cap, leading link to engine, M42 x 1.5 | Lightly grease threads with Never Seez compound 6 Nm (4 ft-lbs) |
| Spring strut to front frame, Hex nut M10 x 1.25 | Loctite 243 34 Nm (25 ft-lbs) |
| Spring strut, front, to leading link, M10 x 1.25 | Optimoly TA 40 Nm (30 ft-lbs) |
| Ball joint to leading link, M14 x 1.5 | Replace nut Micro-encapsulated 130 Nm (96 ft-lbs) |
| Ball joint in slider-tube bridge, M34 x 1.5 | Lightly grease threads Optimoly TA 230 Nm (170 ft-lbs) |
| Quick-release axle clamp screws, M8 x 1.25 | 19 Nm (14 ft-lbs) |
| Steering | |
| Steel handlebars to fork bridge, M8 x 30 | 1st front, 2nd rear -> gap at rear only (as viewed in forward direction of travel) 21 Nm (15 ft-lbs) |
| Handlebar weight to handlebar, M12 x 1.5 x 80 | Micro-encapsulated 21 Nm (15 ft-lbs) |
| Handlebar fitting to handlebar (perch), M5 x 20 | 8 Nm (6 ft-lbs) |
| Pivot screw, handlebar-fitting lever, M5 x 30 | 5 Nm (4 ft-lbs) |
| Rear-wheel drive | |
| Cover to final drive housing, M8 | Loctite 542 30 Nm (22 ft-lbs) |
| Hex nut, drive bevel gear, M24 x 1.5 | Replace screws Micro-encapsulated 200 Nm (148 ft-lbs) |
| Threaded ring, M65 x 1.5 | 160 Nm (118 ft-lbs) |
| Oil filler plug in rear wheel drive, M12 x 1, with O-ring 11.2 x 1.8 | 20 Nm (15 ft-lbs) |
| Rear wheel drive to swinging arm, M12 x 1.5 | 100 Nm (74 ft-lbs) |
| Strut to final drive housing, M10 x 55 | 43 Nm (32 ft-lbs) |
| Reaction link to frame, M10 | 43 Nm (32 ft-lbs) |
| Lock nut, swinging arm to main frame, left, M24 x 1.5 | 145 Nm (107 ft-lbs) |
| Bearing stud, swinging arm to main frame, left, M24 x 1.25 | 7 Nm (5 ft-lbs) |
| Swinging arm to main frame, right, M6 | 9 Nm (7 ft-lbs) |
| Strut left to strut right, M6 x 16 | Micro-encapsulated 8 Nm (6 ft-lbs) |
| Spring strut to rear swinging arm, M10 x 80 | Loctite 243 58 Nm (43 ft-lbs) |
| Spring strut to main frame, M10 x 1.25 | Replace nut Mechanical thread lock 50 Nm (37 ft-lbs) |
| Brakes (w/ABS) | |
| Brake caliper to slider tube, M8 x 32 | 30 Nm (22 ft-lbs) |
| Brake disc to front wheel, M8 x 20 | Replace screws Micro-encapsulated 24 Nm |
| Front brake caliper bleed screw | 5 Nm (4 ft-lbs) |
| Brake caliper, rear, to cover of final drive housing, M8 x 25 | 24 Nm (18 ft-lbs) |
| Brake disc to wheel carrier, M8 x 15.5 | Micro-encapsulated Initial torque, 12 Nm (9 ft-lbs) Final torque, 30 Nm (22 ft-lbs) |
| Rear brake caliper bleed screw, counter-hold w/f 12 banjo bolt, if necessary | 5 Nm (4 ft-lbs) |
| Brake master cylinder to rear frame, M6 x 20 | 8 Nm (6 ft-lbs) |
| Brake-fluid reservoir to rear frame, M6 x 10 | Replace screws Micro-encapsulated 8 Nm (6 ft-lbs) |
| Brake lines -- Connecting piece to rear frame, M6 x 16 | 8 Nm (6 ft-lbs) |
| Brake pipes and hoses to components, M10 x 1 | 18 Nm (13 ft-lbs) |
| Brake pipes and hoses to components, M12 x 1 | 18 Nm (13 ft-lbs) |
| Distributor to front frame, M6 x 12 | 8 Nm (6 ft-lbs) |
| Brake hose cover to strut, M6 x 16 | 8 Nm (6 ft-lbs) |
| Wheels and tyres | |
| Quick-release axle in axle holder, M24 x 1.5 | 50 Nm (37 ft-lbs) |
| Rear wheel to wheel carrier, M10 x 1.25 | in diagonally opposite sequence 60 Nm (44 ft-lbs) |
| Nipple on spoke, M4 | 4 Nm (3 ft-lbs) Variant, Cross-spoked wheels |
| Initial torque, spokes, M4 | 1 Nm (1 ft-lbs) Variant, Cross-spoked wheels |
| Counter-hold spokes, M4 | 1 Nm (1 ft-lbs) Variant, Cross-spoked wheels |
| Motorcycle frame | |
| Rear frame to engine, bottom, M12 x 50 | 55 Nm (41 ft-lbs) |
| Rear frame to engine, top, M10 x 40 | 38 Nm (28 ft-lbs) |
| Rear frame to gearbox, M8 x 55 | 1. Hand-tighten all screws; 2. Tighten gearbox screw first; 3. Tighten remaining screws 28 Nm (21 ft-lbs) |
| Front frame to engine, M12 bolt | Replace nuts Micro-encapsulated 82 Nm (61 ft-lbs) |
| Frame strut to engine, M10 x 40 | Replace screws Micro-encapsulated 38 Nm (28 ft-lbs) |
| Frame strut to front frame, M10 bolt | Replace nuts Micro-encapsulated 38 Nm (28 ft-lbs) |
| Center and Side stands | |
| Center stand to main frame, M10 x 30 | 40 Nm (30 ft-lbs) |
| Center-stand stop to rear silencer, M6 x 16 | 6 Nm (4 ft-lbs) |
| Side stand to pivot mount, M10 x 1 | Micro-encapsulated 56 Nm (41 ft-lbs) |
| Luggage carrier | |
| Luggage rack to rear frame, center, M6 x 25 | Replace screws Mechanical thread lock 8 Nm (6 ft-lbs) |
| Luggage rack to rear frame, at sides, M6 x 30 | Mechanical thread lock 8 Nm (6 ft-lbs) |
| Rear carrier to rear frame section, M6 x 20 | 8 Nm (6 ft-lbs) |
| Luggage carrier to rear carrier, M5 x 16 | 2 Nm (1 ft-lbs) |
| Lock, seat latch, to rear carrier | 2 Nm (1 ft-lbs) |
| Clamp, case holder to rear frame, M6 x 50 | 12 Nm (9 ft-lbs) |
| Case holder through rear carrier to rear frame at top, M6 x 35 | 12 Nm (9 ft-lbs) |
| Adapter plate to luggage rack, M6 x 40 | 8 Nm (6 ft-lbs) |
| Adapter plate to topcase support, M6 x 14 | 8 Nm (6 ft-lbs) |
| Topcase support to rear frame, M6 x 20 | 8 Nm (6 ft-lbs) |
posted by Kelly at 5:53 PM
0 comments
![]()
posted by Kelly at 5:18 PM
0 comments
![]()